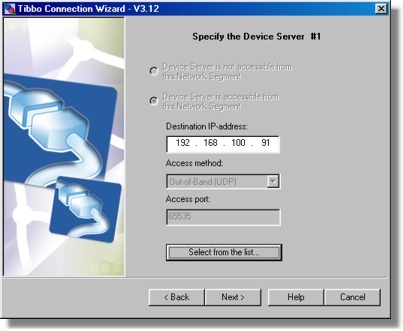
DS #1 (Must be Local)
On this step you select the first DS in the DS-to-DS link (it is called the "DS #1").

As explained earlier , the DS #1 must be local, i.e. it must be located on the same network segment as the PC on which this Wizard is running (DS #2 can be local or remote). Because of that, the accessibility option is fixed at Device Server is assessable from this network segment (if the DS is local it is definitely must be accessible).
Several access options that exist for the DS are also disabled because they are only necessary when you are dealing with the remote DS and the DS #1 cannot be remote.
The only editable option is the IP-address of the DS. You can input this IP-address manually or select the DS from the list:
| • | Click Select DS button and choose the DS from the list. The button brings up the dialog, similar to the main window of the DS Manager. In fact, it is the DS Manager, with the following two differences: |
| • | There is an additional Select button. To select a particular DS single-click on the DS in the device list (in the auto-discoveryaccess mode) and press Select. Alternatively, you can double-click on the DS in the device list. |
| • | The address book and COM access mode are not available. The DS #1 must be local and so you must be able to find it in the auto-discovery mode. |
| • | Click Next. |
When you click Next the Wizard attempts to contact the target DS and makes sure that the DS is local and reachable*. If everything is OK the Wizard reads out all current setting values of this DS.
* The DS Manager and the Connection Wizard have the ability to "see" local Device Servers even if the IP-address of these devices is unreachable (this is done by using broadcast communications- read about this here). The reason why the Wizard demands that the DS #1 has a proper IP-address is because the DS #2 will have to establish a real data connection to this DS and that requires a reachable IP-address.