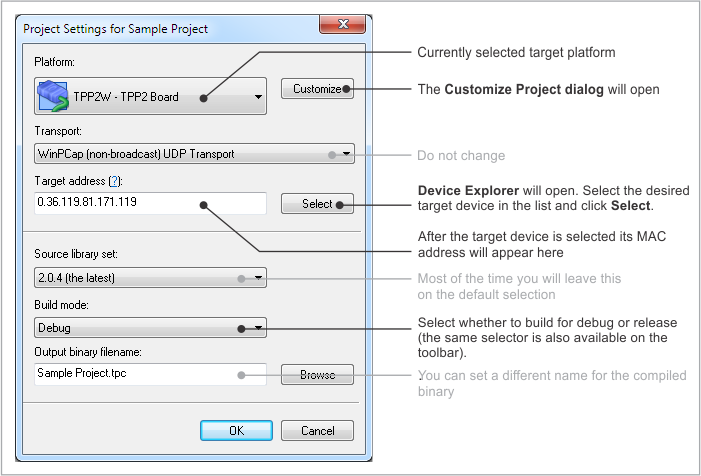
Project Settings Dialog
 File > Project Settings. See also: Customize Project Dialog, Device Explorer, Debugging.

- Platform. Currently selected target platform (i.e., the type of device you will be coding for). The target platform can be changed mid-project, and it's also possible to create applications that compile for a number of platforms, with differences if necessary.
- Customize. Click to access the Customize Project dialog.
- Transport. This decides how TIDE communicates with the selected debug target. Unless you know what you are doing, leave this at WinPCap (not broadcast) UDP Transport.
- Select. Clicking this button brings up Device Explorer. The idea is that you select the target device there and click Select. The MAC address of the selected target device will then appear in the Target address field.
 Device Explorer can also be accessed directly, through Debug > Set/Manage Target.
 - Source library set. For a new project, you will typically leave this field at the default selection. For more information, see Library Sets.
- Build mode. When working on your project, select Debug. When releasing your project into the world, select Release.
- Cross-debugging is only possible with the Debug selection. The debug binary, when uploaded onto the target, will not run automatically. It will wait for debug commands from TIDE.
- Binaries built with the Release selection start executing as soon as your device powers up. All debugging functions on release binaries are disabled.
- Output binary filename. By default, the output binary has the same name with the project folder and the project file (.TPR). You can name the binary differently.
