XModem Serial Updates
All Tibbo devices support XModem serial updates. Such updates can be used to upload just the Tibbo OS (TiOS) firmware or TiOS firmware combined with a compiled Tibbo BASIC/C application binary.
Prerequisites
To perform an XModem serial update:
- You must have the firmware file you will be sending into your device.
- You may upload just a TiOS firmware file (.BIN). All TiOS firmware is published here.
- You may upload a TiOS firmware file combined with a compiled application binary. You can produce such combined files using our BinMerger web app or the legacy BinMerger utility.
- Your PC must have a COM (serial) port. Built-in COM ports are now a rarity — fortunately, there are inexpensive USB-to-serial adapters.
- You will need a "terminal" software supporting XModem file transfers. We recommend our Device Explorer utility, which is available as a standalone application or as part of Tibbo IDE (TIDE), or IO Ninja.
- You will need access to your Tibbo device's serial port (UART).
- If your device has a single serial port (UART), this is the port you will be using.
- If your device has several serial ports, then you will need to use the first port.
- You will need to be able to push the MD button on your Tibbo device (or pull its MD line LOW).
- Optional: You will benefit from observing the patterns "played" by the status LEDs of your Tibbo device.
- Some Tibbo modules require the status LEDs to be connected externally.
For detailed information on preparing a Tibbo device for an XModem firmware update, see the following:
- TPS Devices — TPP2, TPP3, TPP2(G2), TPP3(G2)
- Programmable Serial Controllers — DS1100, DS1101, DS1102, WS1102, DS1202, DS1206
- Programmable Boards and Modules — EM500, EM510, EM1000, EM1001, EM1202, EM1206, EM2000, EM2001, WM2000
Update Procedure
After you have connected the device to your PC, do the following:
1. Run the Device Explorer utility.
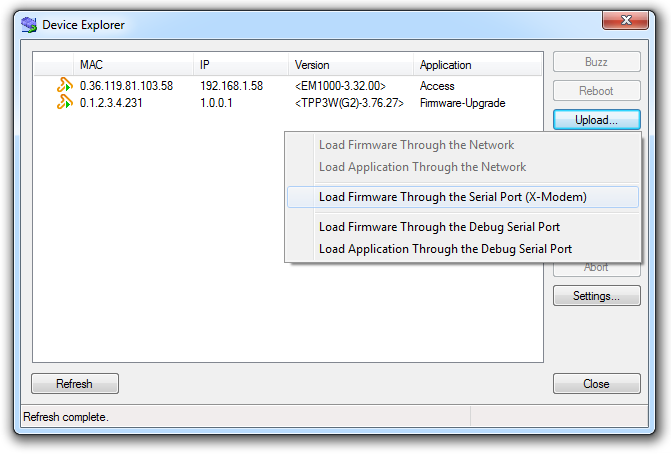
2. There is no need to select any device in the list. Click Upload... and choose Load Firmware Through the Serial Port (X-Modem).
3. When prompted, select the firmware file.
4. When asked, choose the COM port you will use to perform the upgrade and click OK.

5. The M/L flowchart shows how to place your device in the XModem Phase to conduct an update. Alternatively, follow this step-by-step infographic:

Additional Details
- XModem serial updates rely on the XModem protocol. In the protocol, it is the receiving side (in this case, a programmable Tibbo device) that sends the first character in the exchange. This character is the ASCII start of heading (SOH) control code, which means that the receiving end is ready to receive the file. In response to the SOH character sent by the receiving side, the transmitting side (your PC) commences the file transfer. To ensure successful file transmission, always start the file transfer on the PC's end first, then power up your Tibbo device with the MD button pressed (and release the button).
- XModem file transfers time out quickly, in less than a second. If your Tibbo device does not start receiving the file from the PC pretty much immediately after sending the first SOH character, it will abandon the XModem mode. What happens next depends on the availability of the next update mode:
- If your device supports Network Updates, the Monitor/Loader (M/L) will advance to that phase
- If network updates are not supported, the M/L will halt with a "timeout error" pattern (i.e., the red status LED blinking slowly)
For more information on the various update modes and how the M/L selects and handles them, see these two flowcharts:
- The flowchart for all programmable Tibbo devices except the WM2000 and WS1102
- The flowchart for the WM2000 and WS1102
