Demo #1 — Keen
This chapter will demonstrate how quickly and easily the WM2000 can be configured to gather data and send it to the cloud for analysis.

In this chapter, you'll need to copy long strings of text from a website into the L.U.I.S. (Loadable User Interface System) app. To simplify this process, Tibbo strongly recommends that you use a single device for the entire tutorial. This may be either a smartphone (tablet), or a computer equipped with a Bluetooth 4.0 interface (adapter).
L.U.I.S. is available as a smartphone app for iOS and Android, or as a web app.
Due to the limitations of the Web Bluetooth API, the web app only works in recent versions of the Chrome, Chromium, Edge or Opera web browsers running on a Mac or Windows 10 (version 1703 and later) computer equipped with a Bluetooth 4.0 adapter.

If you haven't already, remove your WM2000EV kit from the packaging, and connect the included USB Type-C-to-A cable into the device's USB Type-C connector and into a powered USB Type-A port.
1. Open your web browser and navigate to keen.io (this link opens in a new tab/window). If you already have an account, log in. Otherwise, click on Get Started for Free to create an account.

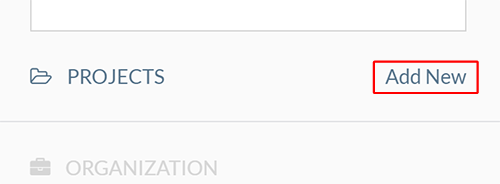
2. After logging in or creating an account, you will be at the Keen management console. Next to Projects in the left-hand menu, click Add New.
If you're on a mobile device, you may have to first click on Projects in the menu under the Organizations drop-down menu to see the Add New button.
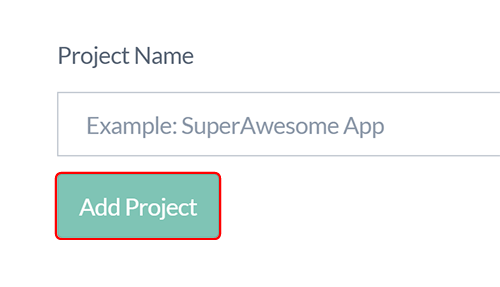
3. Give your project a name (for example, "WM2000") and click Add Project.
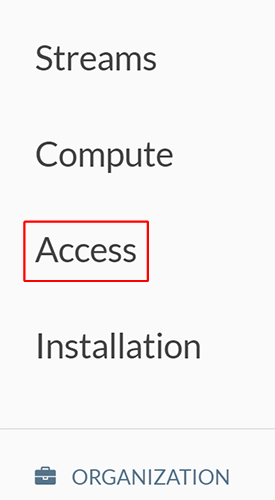
4. After creating your project, you will be on the Dashboards page. In the left-hand menu, click on Access.
On a mobile device, this button will be in the menu under the Projects drop-down box.
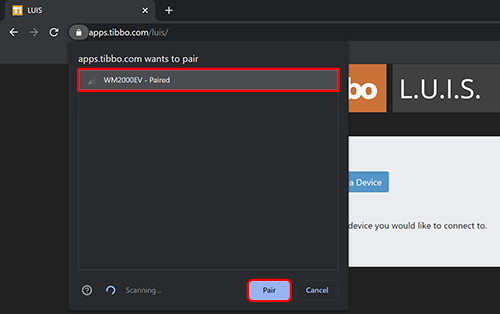
5. Open the L.U.I.S. app (click here to open the web version in a new tab/window). Pair with your WM2000EV. A page with several configurable parameters (settings) will open.
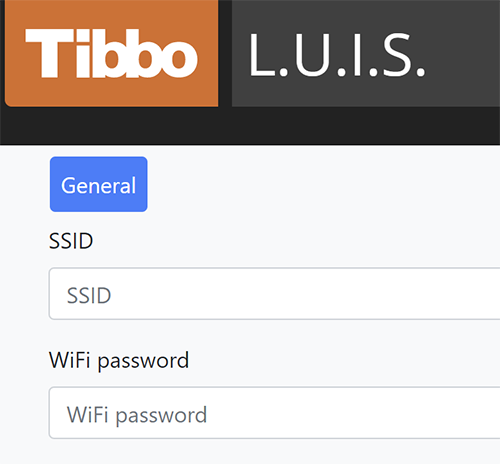
6. Configure the settings for your Wi-Fi network.
|
Keen 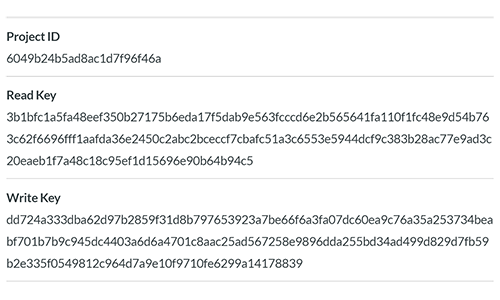
|
L.U.I.S. 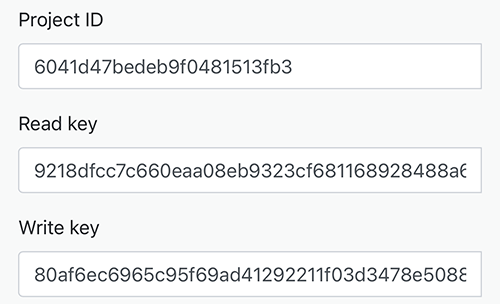
|
|
7. In the Project Details section of the Access page, locate and copy the Project ID. |
8. Paste the Project ID into the corresponding field in the L.U.I.S. app. |
|
9. Next, locate and copy the Read Key. |
10. Paste the Read Key into the corresponding field in the L.U.I.S. app. |
|
11. Then, locate and copy the Write Key. |
12. Paste the Write Key into the corresponding field in the L.U.I.S. app. |
13. Click Save to save the changes, then click Reboot.
The device will reboot and attempt to associate with your wireless network. When a link is established, the Status Yellow (SY) LED will turn on.(1)
After associating with your wireless network, the device will begin periodically sending the sensor data to your Keen account.(2) The Status Green (SG) LED will turn on when the device is transmitting.(3)

14. Let the device gather and transmit the data to the platform for a few minutes. Then, in Keen's left-hand menu, click on Data Explorer; this will take you to the New Query page.
On a mobile device, the Data Explorer button will be in the menu under the Projects drop-down box.

15. Under Analysis, select Median.
16. Under Event Stream, select sensors.
17. Under Target property, select either light or temperature.
18. Under Timeframe, change days to minutes.
19. Under Interval, select Minutely.
20. Click on Run Query.
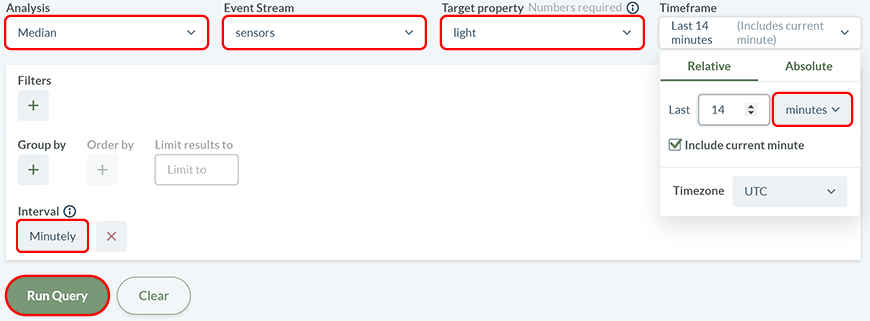
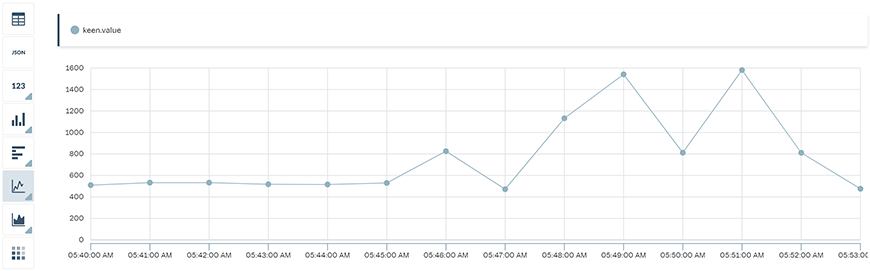
You will be presented with a line graph of the data sent by your WM2000EV to Keen.(4)
- If the SY LED doesn't turn on after about a minute, reconnect to the device via the L.U.I.S. app and check your Wi-Fi settings.
- The evaluation app preloaded on the WM2000 instructs the device to poll the EV kit's sensors every 10 seconds, regardless of whether a wireless link has been established. The polling data is stored locally and sent to the server at the next available transmission interval (set to one minute by default). If the amount of data exceeds what can be sent in one transmission, the module will continue sending in five-second intervals until all stored data is uploaded to the platform and then resume one-minute transmissions.
- The Status Red (SR) LED will blink steadily if the app is unable to connect to the Keen platform. In this case, verify that the device has Internet connectivity and that you correctly entered the Project ID, Read Key, and Write Key.
- The data will be timestamped from 2000-01-01 00:00:00 until the device associates with a network and synchronizes its internal clock.
Congratulations on completing this tutorial. From here, you can experiment with different parameters and settings in Keen. You can also try changing the light conditions and temperature of the EV board's built-in sensors and see how the data changes on the platform. Hint: For quick results, just put your fingers over the sensors.
Your WM2000 will continue attempting to send data to Keen for as long as it is powered on and connected to your Wi-Fi network.
The source code for this app is available on Github. Feel free to explore it, and even use it as the foundation for your own IIoT projects!