Updating Firmware
The Monitor/Loader
The application firmware of Bus Probes is updated with the aid of a resident firmware called the Monitor/Loader (M/L).
The M/L is launched every time a Bus Probe is powered up or reboots. What happens next depends on whether the MD button is pressed at the moment the M/L starts running:
- If the MD button is not pressed, the M/L verifies the sanity of and launches the application firmware.
- If the MD button is pressed, the M/L enters the firmware update mode. This mode is for updating the application firmware of Bus Probes. The firmware is updated via the RS485 port of Bus Probes, using the XModem file transfer protocol.
Update Prerequisites
To update a Bus Probe's firmware, you must have the firmware file you will be sending into that Bus Probe. BP firmware is published here: http://tibbo.com/support/downloads/bus-probe-firmware.html. A single firmware file covers all BP models.
Perhaps the most convenient way of updating the application firmware of Bus Probes is the Bus Probe Firmware Updater web app, which requires Tibbo's Web485 board* and a Chromium-based web browser (Chrome, Chromium, Edge, Opera). Alternatively, you can use a TPS2(G2) system running one of the two Bus Probe testing apps provided by Tibbo.
If you don't have a Web485 board or a TPS(G2) device, you can perform a firmware upgrade from your PC.
* The Web485 board works not only with PCs and Macs, but also Android smartphones.
To perform an XModem serial upgrade from a PC:
- You must have a USB-to-RS485 cable.
- You must have a DC power source providing power in the 5V~12V range.
- You will need "terminal" software supporting XModem file transfers. Any "terminal" software capable of sending files using the XModem protocol will do. For example, you can use Tibbo's IO Ninja software (from V5.1.0) or our Device Explorer utility, which is available as a standalone application or as part of Tibbo IDE (TIDE).
Connection Settings
The baudrate and parity of Bus Probes can be changed from firmware versions V1.05 and V1.06, respectively. The settings you choose for these options will persist through a firmware update.
However, the update itself is handled by the device's Monitor/Loader, which only operates at 38,400-8-N-1. If you're manually updated the firmware on a Bus Probe via XModem, you must use these settings.
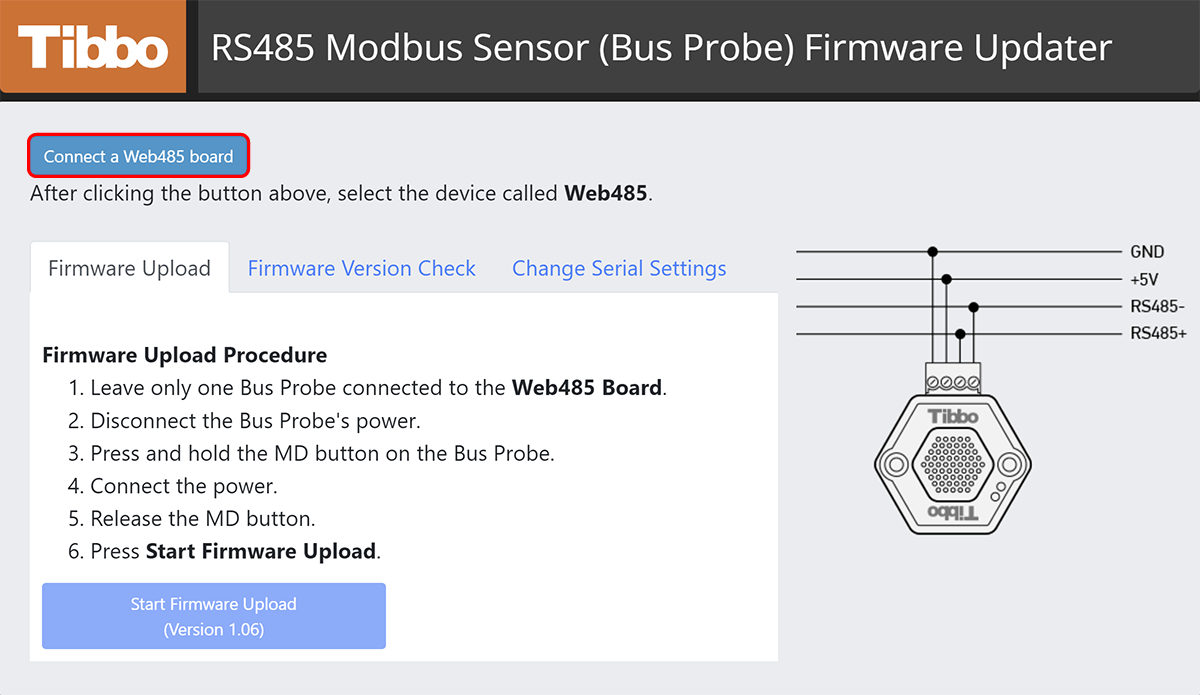
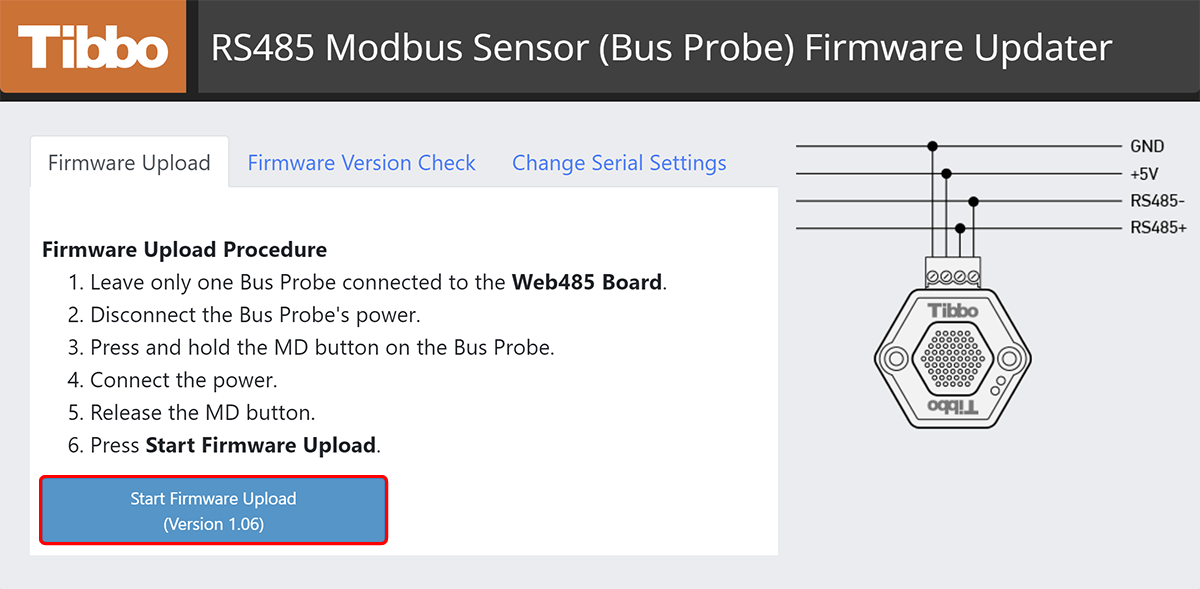
Update Procedure (Web App)
1. Connect the Web485 board to your PC.
2. Open the Bus Probe Firmware Updater web app.
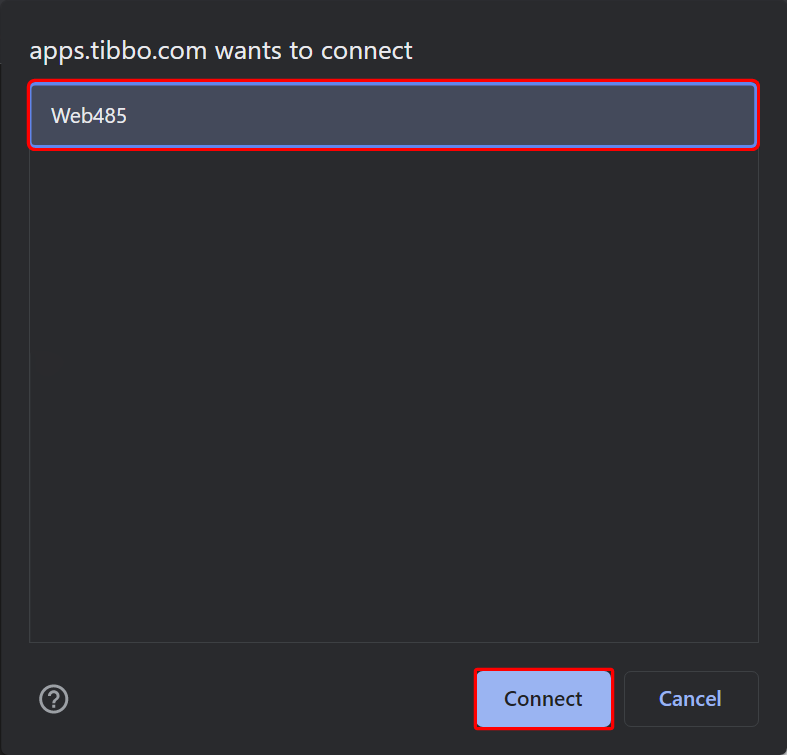
3. Click Connect a Web485 board
4. Select Web485 from the menu and click Connect
5. Press and hold the Bus Probe's MD button.
6. Connect the Bus Probe to the Web485 board.
7. Release the MD button.
8. Click Start Firmware Upload.
9. After the update is complete, power-cycle the Bus Probe
Update Procedure (IO Ninja)
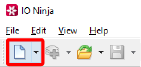
1. Open IO Ninja.
2. Click New Session.
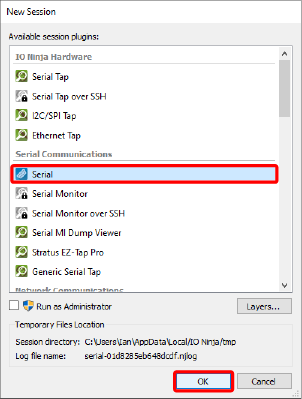
3. Select Serial and then click OK.
4. Click Layer Pipeline.
5. Click Add. Select XModem and click OK. Click OK again.

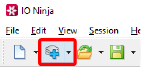
6. Click Settings.

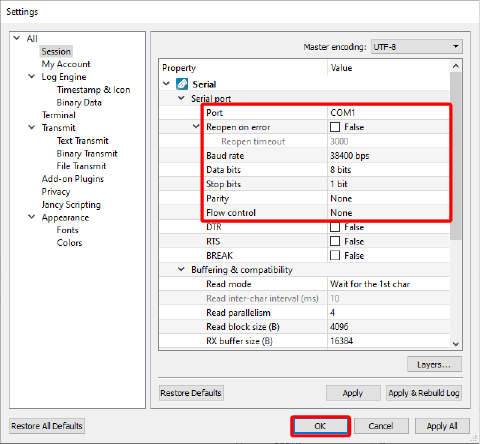
7. Verify your connection settings:
- Correct Port is selected
- Baud rate is 38400 bps
- Data bits is 8 bits
- Stop bits is 1 bit
- Parity is None
- Flow control is None
8. Click OK.
9. Click Open.
10. Click Transmit File with XModem.

11. Press and hold the MD button on the Bus Probe. Each Bus Probe comes with a metal pin that facilitates pressing the MD button.
12. Apply power to the Bus Probe. Once the upload begins, you canc release the MD button. During the upload, the status LEDs will show the following patterns:
 — The Bus Probe is receiving and storing the file
 — XModem transmission has been completed
- A number of error patterns may also be displayed; please refer to the status LEDs topic for more info
13. When the upload is complete, power-cycle the Bus Probe. The newly loaded application firmware will start executing.
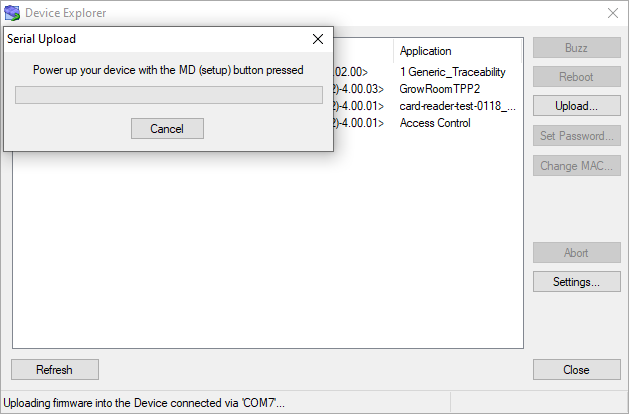
Update Procedure (Device Explorer)
1. Connect the USB-to-RS485 cable to your PC.
2. Interconnect the RS485+ and RS485– terminals of your Bus Probe with the corresponding terminals on the USB-to-RS485 cable.
3. Connect the power source to the +V and GND terminals of the Bus Probe. Keep the supply voltage in the 5~12V range.
4. Turn off the power.
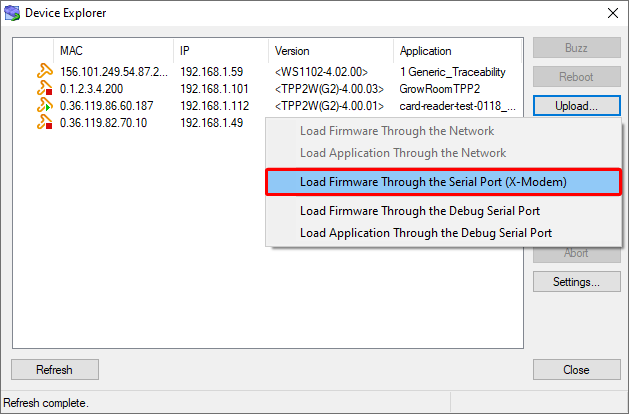
5. Open Device Explorer.
6. Click the Upload... button.
7. Click Load Firmware Through the Serial Port (X-Modem).
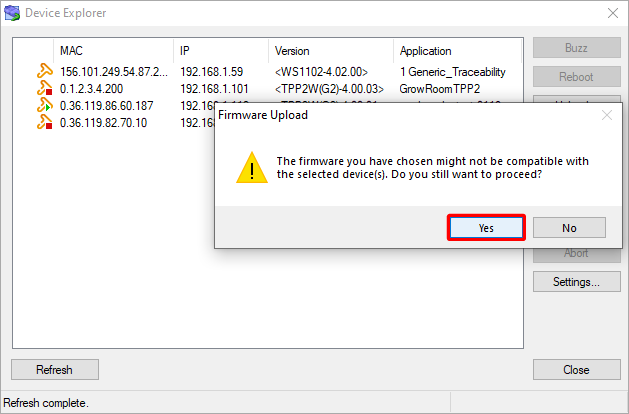
8. Find and select the BP firmware file on your computer and click Open.
9. You'll see a warning prompt; click Yes.
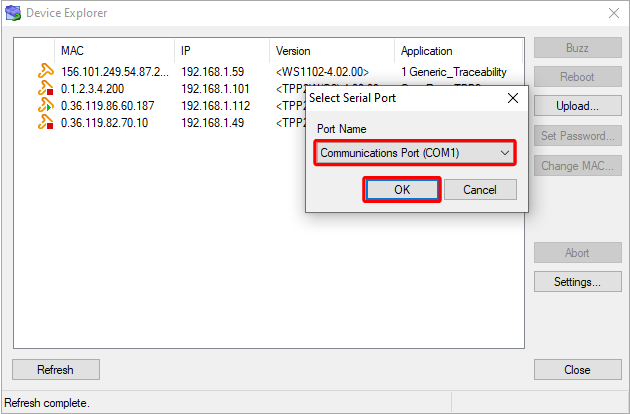
10. Select the COM port you're using from the drop-down menu in the pop-up and click OK.
11. Press and hold the MD button on the Bus Probe, then turn on the power.
12. After the update begins, release the MD button.
13. When the update is complete, power-cycle the Bus Probe. The newly loaded application firmware will start executing.