Demo #4 — Google Cloud Platform
In the first chapter, we connected a WM2000 to a wireless network and securely transmitted data polled from the WM2000EV's integrated light and temperature sensors to the cloud. Next, we configured the WM2000 to associate with a Wi-Fi network automatically, enabled wireless debugging, loaded an application, and directly controlled the WM2000EV's onboard RGB LED via a web interface.
Like in the previous step, we'll update TiOS on your WM2000 in this chapter, because a new syscall is required to work with Google Cloud Platform. Then, we'll securely connect with Google Cloud Platform (GCP) to transmit data, as well as receive and execute commands.
In this chapter, you'll need to copy long strings of text from a website into the L.U.I.S. (Loadable User Interface System) app. To simplify this process, Tibbo strongly recommends that you use a single device for the entire tutorial. This may be either a smartphone (tablet), or a computer equipped with a Bluetooth 4.0 interface (adapter). Due to the complexity of GCP, we suggest that you use a computer.
L.U.I.S. is available as a smartphone app for iOS and Android, or as a web app.
Due to the limitations of the Web Bluetooth API, the web app only works in recent versions of the Chrome, Chromium, Edge or Opera web browsers running on a Mac or Windows 10 (version 1703 and later) computer equipped with a Bluetooth 4.0 adapter.
Updating TiOS on Your WM2000
The project for this demonstration (located in the IoTCore folder of the WM2000EV Project Repository) requires a TiOS version of at least 4.01.04. To simplify uploading the application, we supply a Tibbo Composite Uncompressed (TCU) file — GCP_IoTCore-wm2000.tcu — containing the correct firmware, the Companion App, and this project. The following instructions use our BLE Firmware Updater web app, but this upgrade can also be accomplished with the Tibbo Updater smartphone app (available for iOS and Android).
1. Place your WM2000 in the update mode's BLE phase. The Monitor/Loader V4 Flowchart shows how to do this. Alternatively, follow this infographic that summarizes the steps:

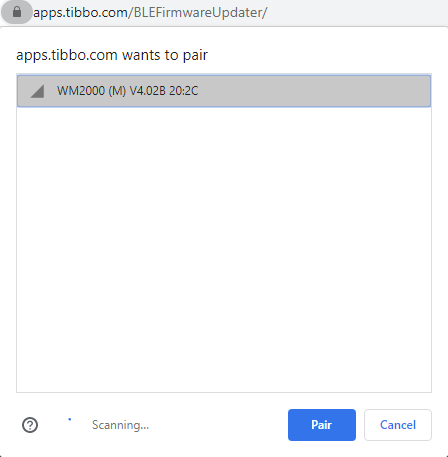
2. Open the BLE Firmware Updater (click here to open the web app in a new tab/window).
3. Click on the button labeled 4 at the bottom. Then click on Connect a device.

4. Select your WM2000 from the pop-up dialog and click Pair.
5. Click on Update Firmware From Local File.
6. In the dialog, find and select the GCP_IoTCore-wm2000.tcu file in the repo. Then click on Open.

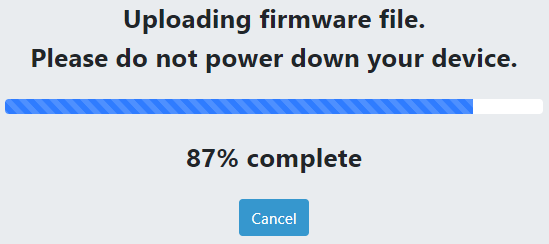
7. The firmware update, Companion App, and demo project will be uploaded to the device.
Do not power off the device.
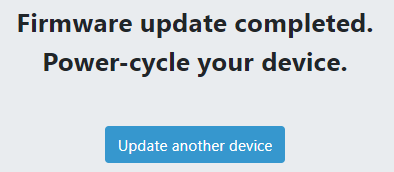
8. When the update is complete, the device will reboot automatically.
Connecting Your WM2000 to Google Cloud Platform
As this demonstration connects to Google Cloud Platform, it goes without saying that you'll need a GCP account. If you do not already have an account, Google currently offers a free trial of GCP services. Note that a credit card is required for identity verification. The following instructions assume that you will be setting up a new account; if you already have one, navigate to the GCP Console and skip to step number 9.
These instructions also assume that you have configured your WM2000 to associate with a Wi-Fi network automatically and enabled wireless debugging. If you need help doing so, please refer to the second chapter for guidance.
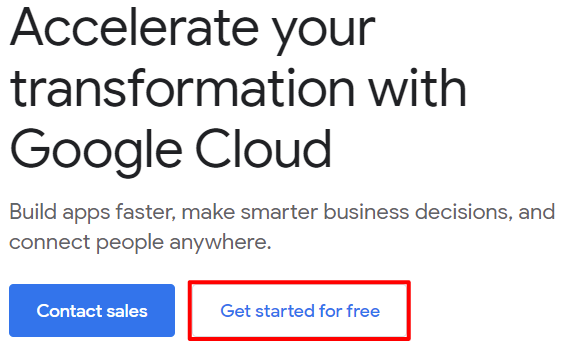
1. Open a new browser window/tab and navigate to cloud.google.com.
2. Click on Get started for free.
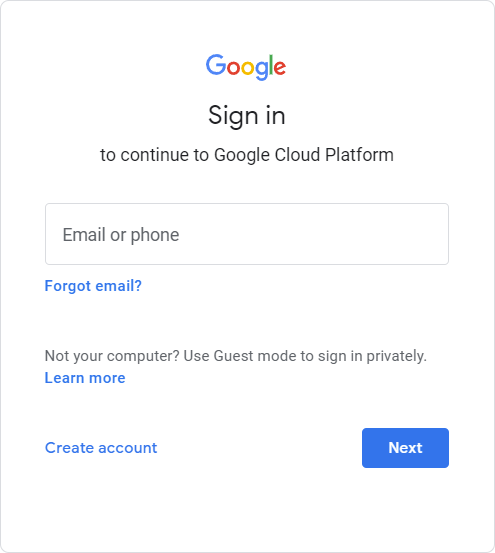
3. Sign in or create a Google account.
4. Enter your account information and click Continue.
5. Enter your mobile number and click Send Code to receive a verification code.
6. Enter the verification code you received and click Verify.
7. Enter your payment information. Depending on your local laws and regulations, you might be required to input your business' tax information. Finally, you will have to provide a credit card for the final verification of your identity. When you're done, click Start My Free Trial.
Note: Tibbo is not affiliated with Google. We chose Google Cloud Platform for this demonstration because it is one of the world's largest cloud services platforms and is commonly used for Internet of Things (IoT) applications.
As the Google Cloud Platform website states, your credit card won't be charged unless you upgrade. If you have any unintended charges associated with Google Cloud Platform, please contact Google directly for assistance.
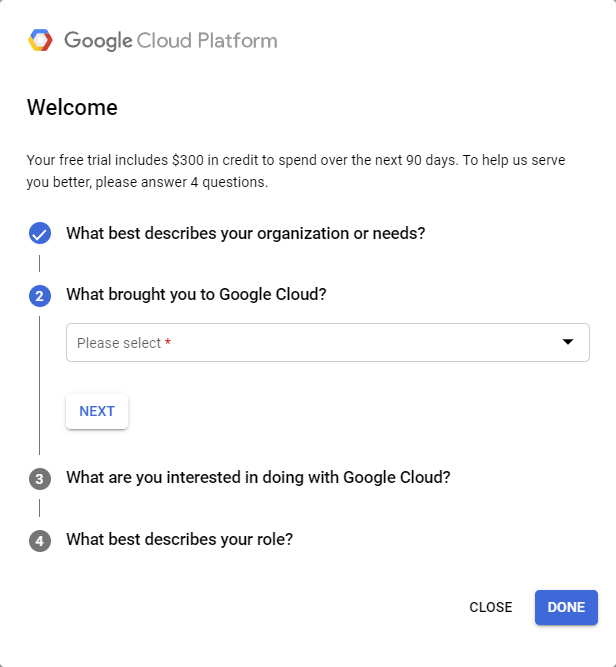
8. You will be taken to the Google Cloud Platform console, starting with an introductory survey. You can fill it out or just click Close to proceed.
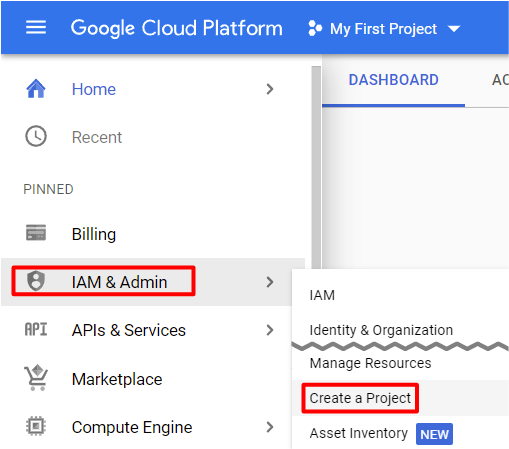
9. In the left-hand navigation menu, hover over IAM & Admin. In the pop-out submenu, click Create a Project.
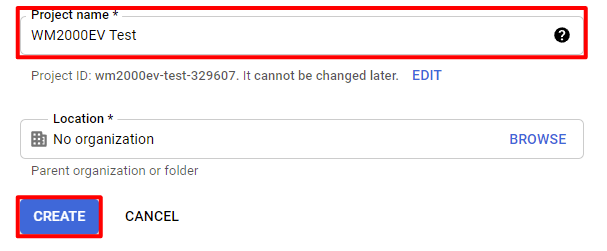
10. Give your project a name and then click Create.
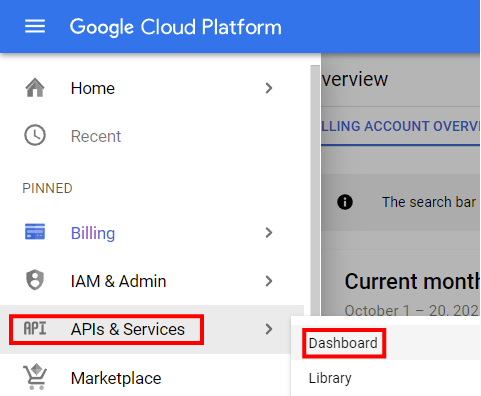
11. In the left-hand navigation menu, hover over APIs & Services. In the pop-out submenu, click Dashboard.
12. Next to the APIs & Services header, click Enable APIs and Services.

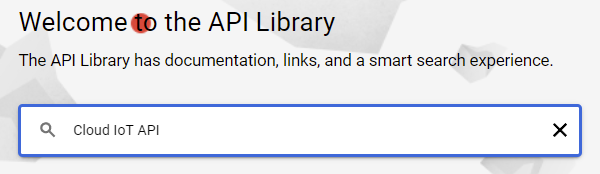
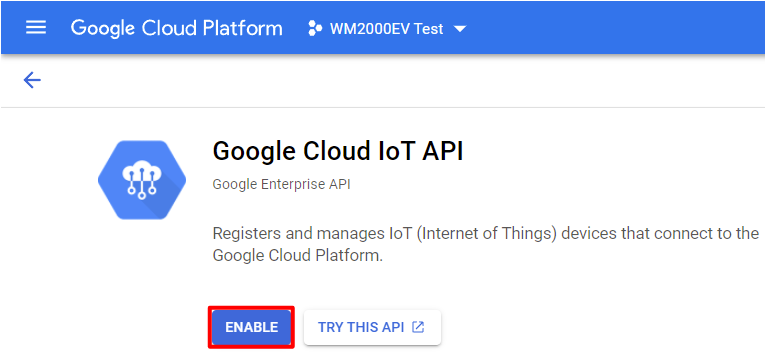
13. In the central search box, input Cloud IoT API and press enter.
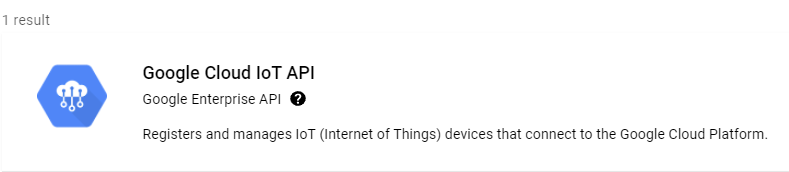
14. There will be only one result: Google Cloud IoT API. Click it.
15. In the details page for the API, click Enable.
16. In the left-hand navigation menu, hover over APIs & Services. In the pop-out submenu, click Dashboard.
17. Next to the APIs & Services header, click Enable APIs and Services.
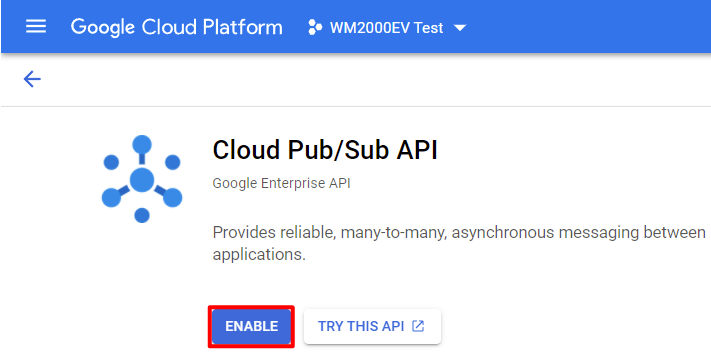
18. In the central search box, input Cloud Pub/Sub API and press enter.
19. Click on the result that reads: Cloud Pub/Sub API.
20. In the details page for the API, click Enable.
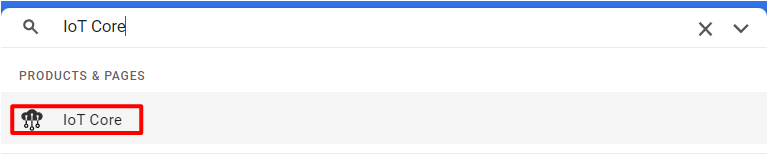
21. In the central search bar at the top of the screen, input IoT Core. Click IoT Core in the search results.
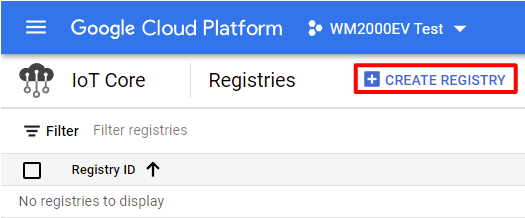
22. Next to the Registries header, click Create Registry.
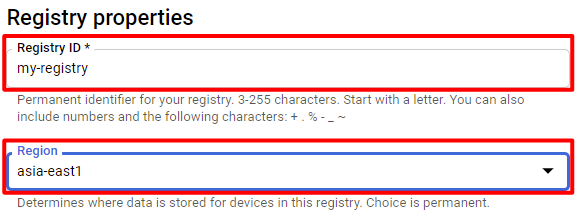
23. Give your registry a name and select the region closest to you for device data storage.
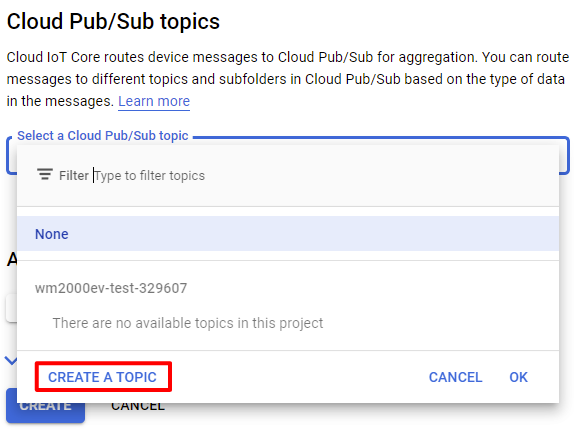
24. Under the Cloud Pub/Sub topics header, click on the Select a Cloud Pub/Sub topic drop-down menu. Then, click Create a Topic.
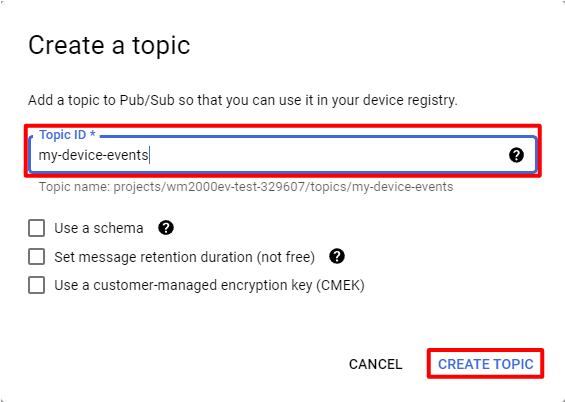
25. Name your topic. Do not check any of the following checkboxes. Click Create Topic.
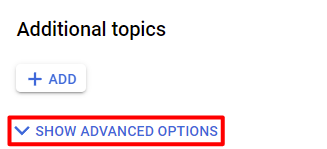
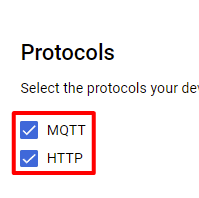
26. Under the Additional topics header, click Show Advanced Options. Under the Protocols header, make sure that MQTT and HTTP are checked.
27. Click Create.
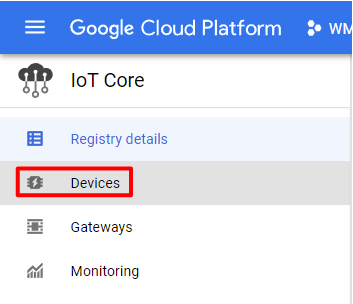
28. In the left-hand navigation menu, click Devices.
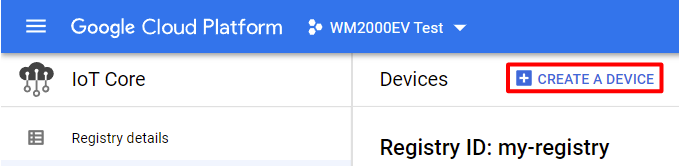
29. Next to the Devices header, click Create a Device.
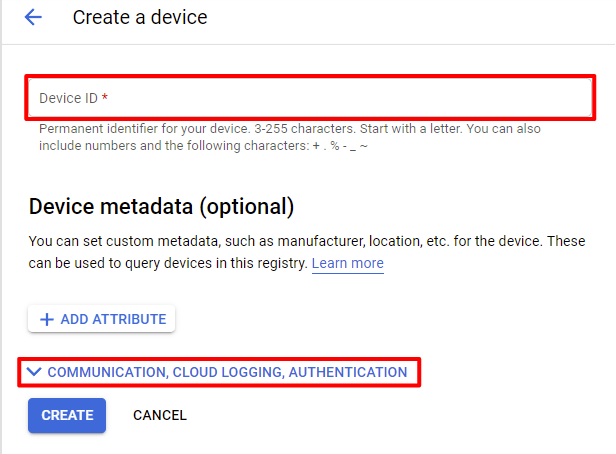
30. Name your device.
31. Click Communication, Cloud Logging, Authentication to expand the visible settings on the page. Under the Device communication header, make sure that Allow is selected.
32. In the top-right corner, click the Activate Cloud Shell icon. Google's Cloud Shell will open at the bottom of the window.
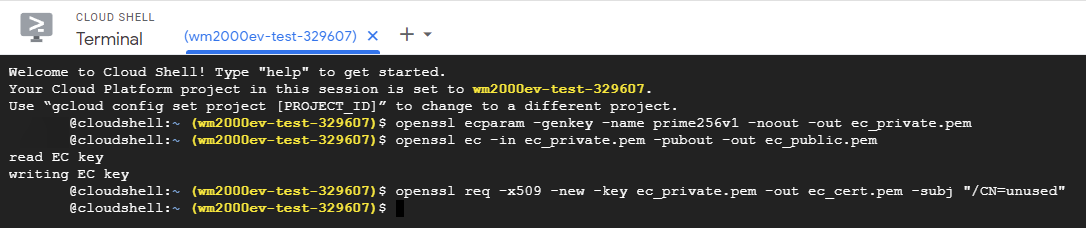
33. In Cloud Shell, run this command: openssl ecparam -genkey -name prime256v1 -noout -out ec_private.pem. This generates the P-256 elliptic curve private key.
34. Next, run this command: openssl ec -in ec_private.pem -pubout -out ec_public.pem. This generates the P-256 elliptic curve public key.
35. Finally, run this command: openssl req -x509 -new -key ec_private.pem -out ec_cert.pem -subj "/CN=unused". This generates the ES256 key with a self-signed X.509 certificate.
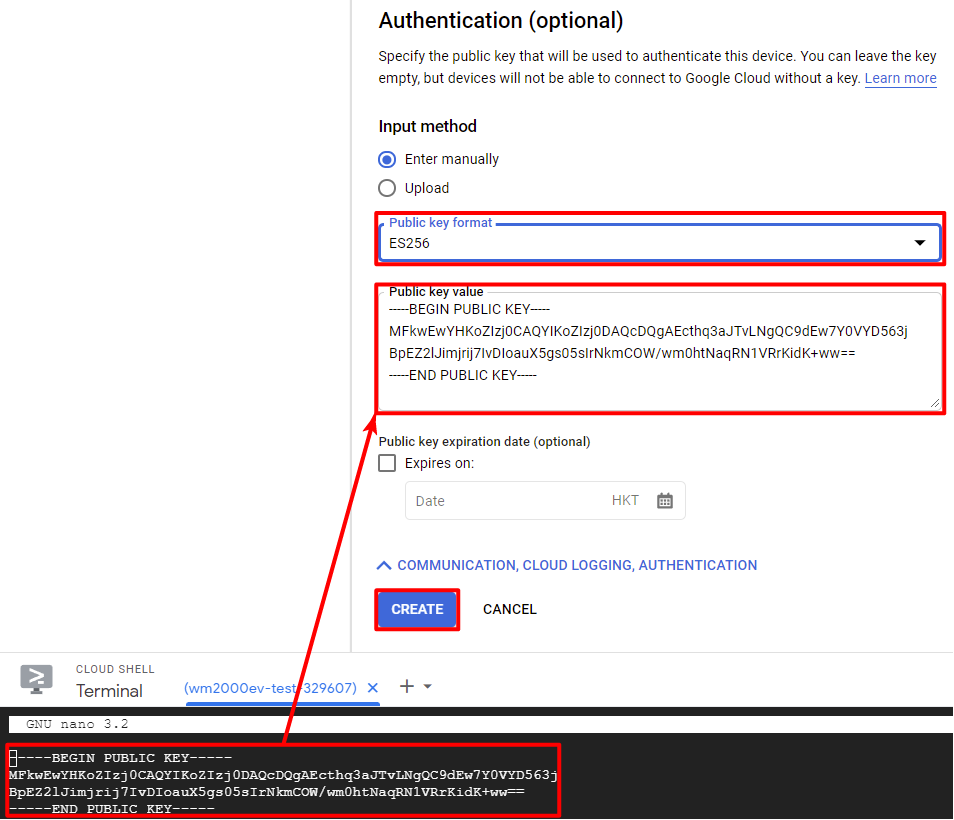
36. In Cloud Shell, run nano ec_public.pem. This opens up the public ES256 key in a text editor.
37. Highlight the entire key, including the opening -----BEGIN PUBLIC KEY----- and the closing -----END PUBLIC KEY----- sections. Your selection will automatically be copied to the clipboard.
38. Press Ctrl+X to exit the text editor.
39. In the Public key value under the Authentication section of the device settings page, paste the key.
40. Change the Public key format selection to ES256.
41. Click Create.

This demo project requires a TiOS version of 4.01.04 or newer. If your device is running an older version, attempting to connect it with Google Cloud Platform will result in continuous reboots.
If you haven't already, Tibbo strongly recommends that you follow the BLE update process detailed in the Updating TiOS on Your WM2000 section before you continue.

L.U.I.S.
42. Power on your device and open the L.U.I.S. app (click here to open the web version in a new tab/window). Pair the app with your WM2000.
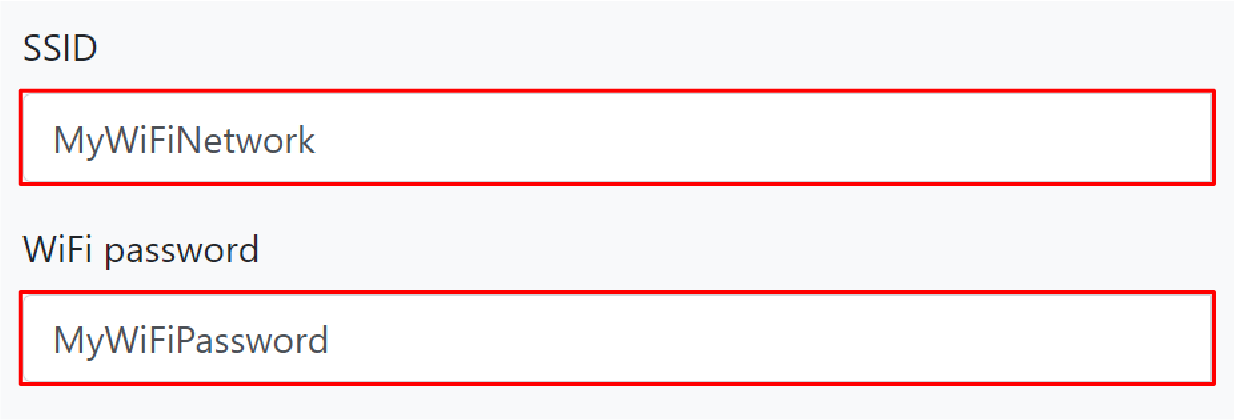
43. Enter the SSID of your Wi-Fi network in the SSID field.
44. Enter the password for your Wi-Fi network in the WiFi password field.
Note: If your WM2000 is set to use wireless debugging, changing your Wi-Fi settings could result in a connection loss in some cases, particularly if the module is switched to a network segment not visible by your computer. In such cases, you can reconnect via the L.U.I.S. app to reconfigure the Wi-Fi settings or use the BLE Console to change your debug interface.
Google Cloud Platform

45. In the top-left corner, click your project's name. The project selection pop-up will appear.
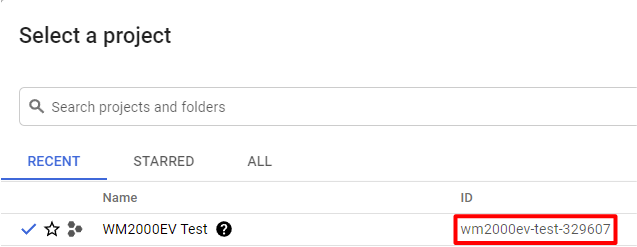
46. Copy the ID of your project.

47. Paste the string you copied into the Project ID field.
Google Cloud Platform
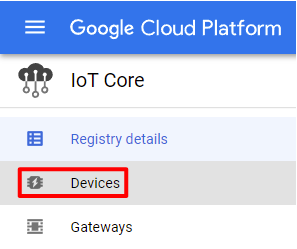
48. In the left-hand navigation menu, click Devices.
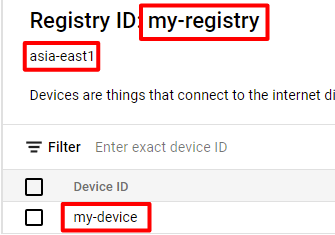
49. Copy your Registry ID.

50. Paste the string you copied into the Registry ID field.

51. Set the Location ID field to match the location in Google Cloud Platform.
52. Copy your Device ID.

53. Paste the string you copied into the Device ID field.
54. In the top-right corner, click the Activate Cloud Shell icon. Google's Cloud Shell will open at the bottom of the window.
55. In Cloud Shell, run nano ec_private.pem. This opens up the private ES256 key in a text editor.
56. Highlight the entire key, including the opening -----BEGIN EC PRIVATE KEY----- and the closing -----END EC PRIVATE KEY----- sections. Your selection will automatically be copied to the clipboard.

57. Paste the string you copied into the Private key field.

58. Click on Save.
59. Click on Reboot.
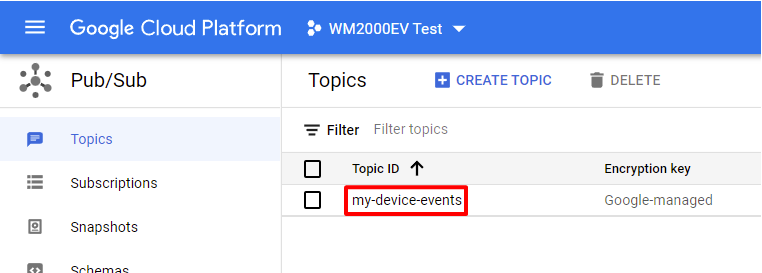
60. In the central search bar at the top of the screen, input Pub/Sub. Click Pub/Sub in the search results.

61. Click your Topic ID.
62. Under the Subscriptions tab at the bottom, click Create Subscription and then click Create subscription.
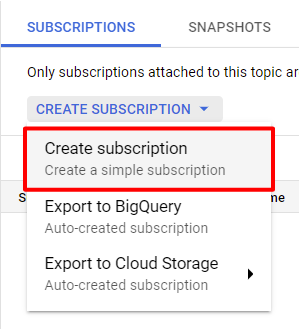
63. Name your subscription.
64. Make sure that under the Delivery type header, Pull is selected.
65. Click Create.

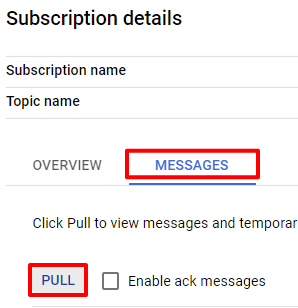
66. On the subscription details page, click the Messages tab.
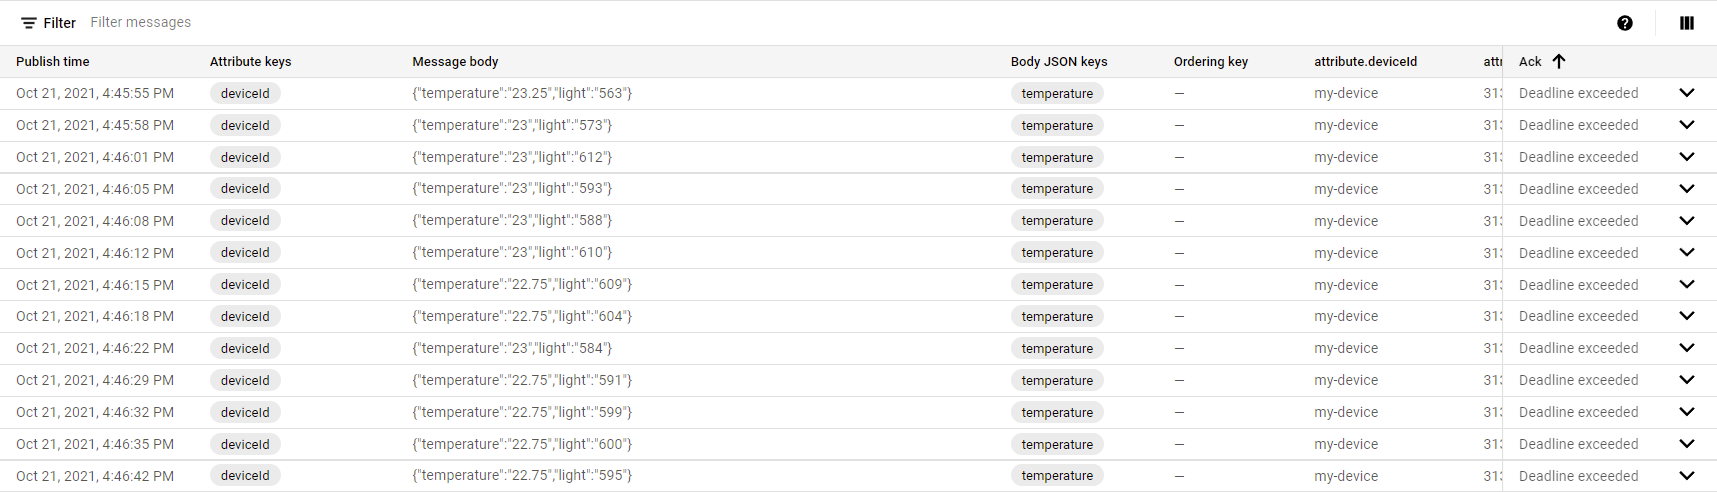
67. Click Pull.
Controlling Your WM2000 from Google Cloud Platform
As we mentioned at the start of this tutorial, your WM2000 can receive and execute commands sent via GCP. The demonstration application is preconfigured to receive commands from Google to turn on the WM2000EV's RGB LED in a pattern you determine. The following instructions demonstrate how to use the command function.
1. In the central search bar at the top of the screen, input IoT Core. Click IoT Core in the search results.
2. Click on your registry.
3. In the left-hand menu, click Devices.
4. Click on your device.
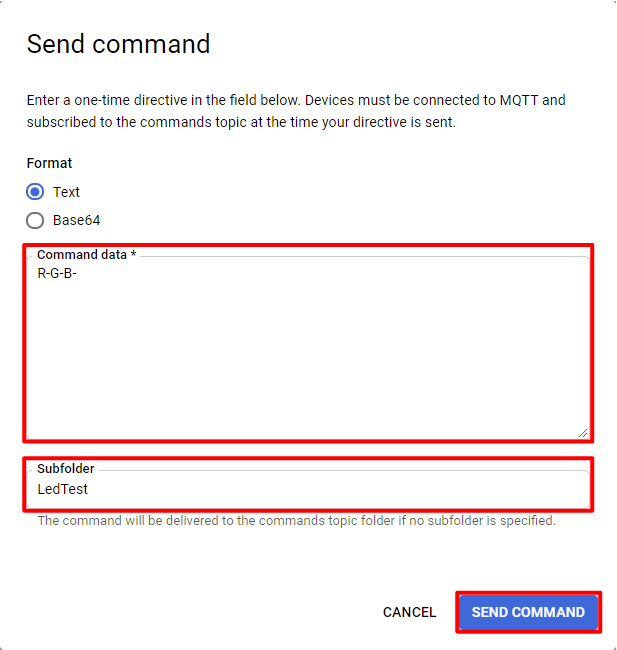
5. At the top of the page, click Send Command next to the Device details heading.
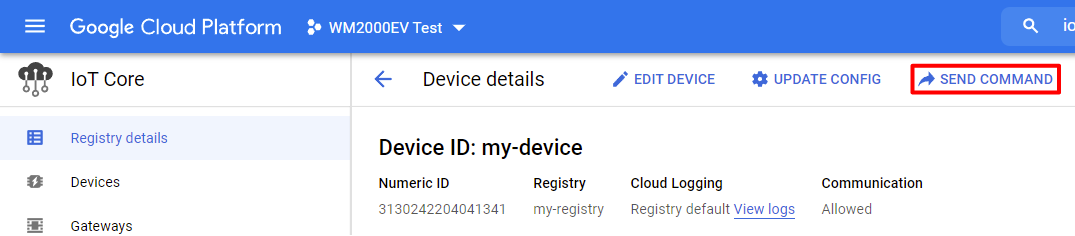
6. In the pop-up dialogue, enter R-G-B- in the Command data box and LedTest in the Subfolder field. Click Send Command. Your WM2000EV's RGB LED will flash red, green, and blue before turning off. Feel free to experiment with other patterns.
Note that if you don't end with "-" (dash), the LED will remain on at the last color in the pattern.